Moving your website from WordPress to Squarespace
Are you thinking about moving your website from Wordpress to Squarespace? There are a few reasons why you might be considering such a move. The most common ones I hear from my clients are things like:
“I’m not satisfied with the design of my Wordpress site and want something more visually appealing”
“I no longer work with the original designer and I’m struggling to maintain the site”
“I want a website I will be able to manage myself after it launches”
All makes sense – and Squarespace can resolve all these issues. But – anytime you move your website from one platform to another, you do risk taking a hit from an SEO perspective (i.e. a drop in traffic from Google to your site). In fact, a dip in traffic is likely to occur anytime you move platforms, redesign your site or of course if you change URL.
To minimise the impact – you should always work with a professional Squarespace designer (hello!) who can ensure you end up with a visually stunning and unique website, and to help you maintain your Google rankings. Read on to find out how I do just that for my clients, and what steps you need to make sure you follow if you are going solo.
Follow the 6 steps below to minimise traffic loss when migrating a website from Wordpress to Squarespace.
Step 1. Create a list of all the URLs on your current/WordPress website.
This step is all about understanding the exact structure of your current site and mapping out all the pages it contains to make sure nothing is forgotten or overlooked in the move. You can do this by looking in your CMS if you have a small website, but if you have a blog or a larger site, this would be pretty time-consuming. In that case – use a crawling tool (I like Screaming Frog) to crawl your site and export a list of all URLs to Excel. In Excel, create a two column sheet – put your Old URLs in column A, and leave Column B blank for now – but this will be where you insert your new URLs after you’ve designed the new site in SS.
Step 2. Migrate your content from WordPress to Squarespace.
If you have a lot of content in your WordPress site that you want to maintain in Squarespace (albeit with a nicer design) – you will want to import the content automatically, to save copying and pasting (or, god forbid, re-writing everything). Luckily Squarespace makes this process pretty painless - follow their step-by-step guide here.
Step 3: Optimise your new website in Squarespace
With the content moved across, the fun part is getting the design looking exactly how you want. Once the design is ship shape – you need to go through the site page-by-page and optimise each page for search by including appropriate URLs slugs, title tags, meta descriptions, image alt tags and header tags on all pages and blog posts. I use a 20-point SEO checklist for every client website to ensure we have SEO nailed.
Step 4: Set Up your 301 Redirects
A 301 redirect tells web servers, and Google, ‘the page that used to be here, is now over here’. It helps preserve your search engine rankings and ensures your visitors can still find your content (for example, if they have bookmarked a page other than your homepage).
This is actually really easy to do in Squarespace.
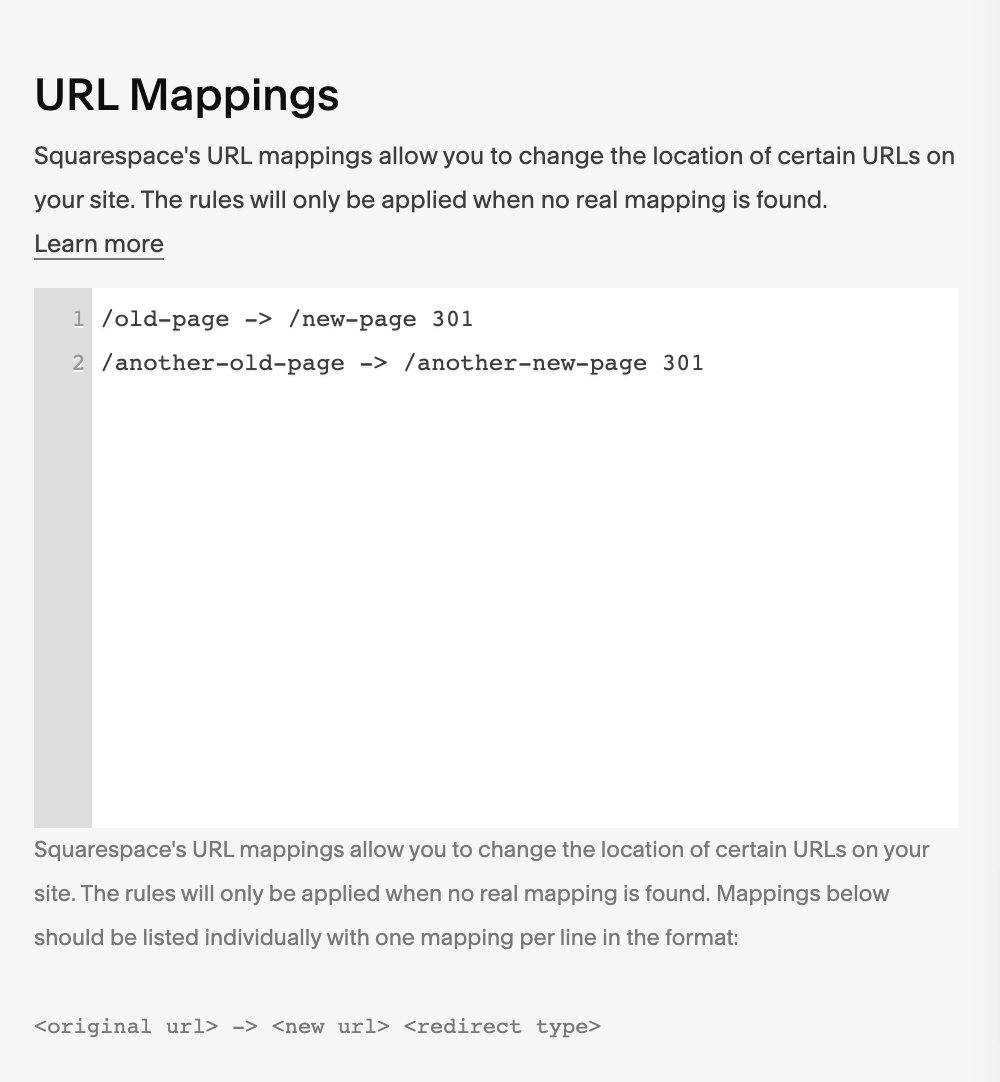
Open the Excel spreadsheet you created in Step 1. In Column B, enter the corresponding new URL for each page of your new website that corresponds to your old website. For example, if your company background page was called About and it is now called About Us, the old URL is probably /about and the new one is probably /about-us. For any page where the old and new URLs are the same – just note this in the Excel and you don’t need to do anything additional. For all the URLs that have changed from the old site to the new one – you need to enter these in the URL Mappings tool in Squarepace, which you will find by clicking on Settings – Advanced – URL Mappings.
You will then just enter a list showing the old URLs and the new URLs, like in the example image below, and hit Save and you’re done.
Step 5. Update your sitemap
Generate a new sitemap for your Squarespace site and submit it to Google Search Console. This will help Google index your new site and ensure that your content is easily discoverable by search engines.
6. Keep an eye on your traffic and rankings
After you’ve launched the new site, it’s a good idea to keep a little eye on your website traffic and rankings to ensure that there are no significant drops. If you notice any issues, take corrective action immediately, by fixing broken links or updating your redirects if needed.
Following the steps above will greatly help mitigate any drop in traffic when you move from WP to Squarespace. And in fact, if you work with a web designer that prioritises SEO and builds this into the site development process, you may even get a traffic boost from moving from Wordpress to Squarespace. If you’re considering moving your site, drop me a line with any questions you have – I’m happy to help and share my experience!